Toolbars
Planning is the first and probably the most important task in customizing tool bars. Do you want to extend an existing toolbar? What command(s) do you want included in your new tool bar? What will the icon look like to identify your tool bar command? What location on the toolbar will the icon be placed?
AutoCAD provides several default toolbars arranged in common groups for ease in general use. Toolbars have commands spread along their length, identified by Button Images. Toolbars come in two general flavors: stand-alone and fly-out.
Stand alone toolbars may float in the drawing area, be docked on the margins of the screen, or be turned off.
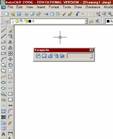
When a toolbar floats, the name of the toolbar appears on the top bar of the toolbar. When the toolbar is docked, the name does not appear.
Flyout toolbars are attached to other toolbars in a parent/child relationship. Flyout toolbars allow related commands such as circles by center/radius, center/diameter, two points, three points, tangent/tangent/radius, and tangent/tangent/tangent to be grouped into one flyout toolbar allowing selection of a variety of commands of with minimal space allocation.
Customizing toolbars can follow many paths: rearranging the commands in an existing toolbar, adding and removing commands on an existing toolbar, adding fly-out toolbars to existing toolbars, and creating new toolbars that may include fly-out toolbars.
To modify an existing toolbar
Pick Tools pull-down ► Customize ► Interface ,
Or
Type CUI at the command line,
Or
Right click over any toolbar,
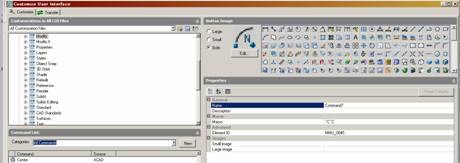
to start the Customize User Interface (CUI)
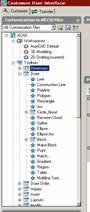
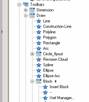
The Customize User Interface displays the menu structure. Choose the boxed + sign to the left of the Toolbar icon to expand the menu. The tree structure shows the variety of toolbar menus listed and the individual commands for each toolbar identified with stars. Picking the boxed + sign expands the tree structure. Picking the boxed – sign collapses that particular line of the tree structure.

To change the position of a command on a Toolbar, or move a command to another Toolbar pick the name of the command and drag the symbolic bar to the new position.
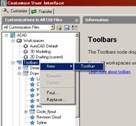 To
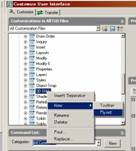
create a new toolbar, Right click on the Toolbar icon, select New, and select Toolbar
from each cascading menu. A new toolbar,
named Toolbar1, will be added to the bottom of the toolbar list.
To
create a new toolbar, Right click on the Toolbar icon, select New, and select Toolbar
from each cascading menu. A new toolbar,
named Toolbar1, will be added to the bottom of the toolbar list.
The new toolbar can be immediately renamed to reflect the intended use. Any toolbar can be renamed by right clicking on the toolbar name and selecting rename.
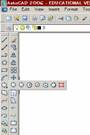
The new toolbar will be visible in the drawing area. Without associated commands the toolbar size will be minimal, probably not long enough to show the name.
Still in, or back to the CUI.
From the Command List pane, existing commands can be picked, dragged, and placed in the new toolbar.
Choose New from the Command List pane to begin creating a new command. The Properties pane will present options for Name, Description, Macro, Element ID, Small image, and Large image. AutoCAD will give a default name and the Element ID. The name is what will show on the Toolbar menu and should reflect the use. The Element ID is provided by AutoCAD and should not be changed. The Element ID allow the command to be used in other menus without recreating the properties.
Once the properties have been established, the command will appear in the Command List pane.
The command can be dragged and placed just below the new toolbar. Just below the toolbar, NOT to the right or off the end of the toolbar name.
When all of the commands have been added, click Apply and then OK.
To create flyout toolbar menu
Open the CUI.
 In the Customization in All CUI files pane, expand
the toolbar tree and highlight the toolbar that will have an added flyout.
In the Customization in All CUI files pane, expand
the toolbar tree and highlight the toolbar that will have an added flyout.
Right click on the toolbar name, pick ►New ► Flyout.
Rename the Flyout menu and add commands by dragging existing commands from the Command List pane or creating them as explained above.
To create a flyout from another toolbar
An existing toolbar can become a flyout toolbar. In the Customization in All CUI files pane, expand the toolbar tree and highlight the toolbar that will become the flyout toolbar. Drag the toolbar and drop it on the name of the ‘parent’ toolbar when the “◄” appears at the end of the toolbar name.
Click Apply, to activate the current changes, click OK when all of the modifications have been completed.